Why settle for classic gift cards, if you can make a pop-up card with your own hands? We will guide you step by step with 3 different tutorials, simple and quick to put into practice for cards with Christmas trees and snowmen.


Christmas is coming and stay already thinking to which greeting card to be able to put next to of the your gift to top it all off. Why not try to make a Christmas pop-up card with your own hands?
IS much more simple than it may seem and it will take a few minutes is few needed to make one of effect that may surprise the person to whom it will go as a gift. We we offer you techniques different for tickets easy to to be able accomplish even with your children. Have fun!

Two quick and easy versions for a tree pop-up card
Among our proposals, certainly an easy option cannot be missing for those who are not good with the art of DIY and have little time available, or simply want to do it with their children.
Read also: IKEA gift ideas for Christmas 2020
It is about two simple tutorials with which to make pop-up cardsup starting from an existing greeting card, but that’s it designed only externally, to decorate then inside with a tree Handmade.
The material you will need for both tickets they are the same that we list below. What will change instead will only be the method of realization. You will need:
- a Christmas greeting card
- vinyl glue
- green napkins
- scissors
- stapler.

Version 1
The version number one expects inside the ticket a tree with an appearance “accordion” style, which will make it original. Let’s proceed!
- Take a green napkin and open it in half.
- At this point cut 4 strips of different thickness between them, so a strip of napkin will be more double and will be the base of your tree and then have the thinner strip on top.
- Take each strip is folds on itself like an accordion, then you fold in first, then turn the napkin and make another fold, then turn, and so on until the end.
- Now that you are done, fold the resulting strip in half and press so that the sign remains visible. Reopen is, where the center is marked, put a paper clip with the help of stapler. Do the same with all the strips.
- Open the ticket and go to place on the opening in the center, the strips in descending order starting from the bottom and paste with vinyl glue.
- On each strip, put a drop of glue on the end left and right. Crease then the right end to the left, so that the two parts will fit together. Keep it up until the work is done.
At this point you can decide to leave it natural, or decorate the tree with a star on top and decoration balls created with colored cardboard.

Version 2
The second version of this easy easy tutorial, it’s very similar to the first but the tree has a look more faithful to reality.
- Take 3 napkins and fold them in half. Press so that the crease is visible.
- Leave a couple of inches at the bottom and a centimeter in the upper part, then with the stapler fix the center with a couple of paper clips at a distance from each other.
- Now fold again in half the napkin and on the back draw with a pencil half tree silhouette also drawing the trunk, or alternatively you will draw it later on the cardboard with a brown marker.
- Cut the outline of the tree is place it in the inside fold of the ticket, then paste. Close the card and press to make the glue adhere better. Now do the same with the other side.
- Put a drop of glue on each branch and fold a layer of napkin from left to right and continue like this until you are done all layers of the napkin.
You may be interested in: 3 DIY Christmas card ideas
Now the work is done and it has become a Christmas pop-up card!

Snowman pop-up gift card
After the instructions on the Christmas tree card, could not miss a tutorial with a nice snowman!
To create one you will need:
- a colored A4 card
- a white a4 sheet
- pencil
- scissors
- glue
- black and orange marker.
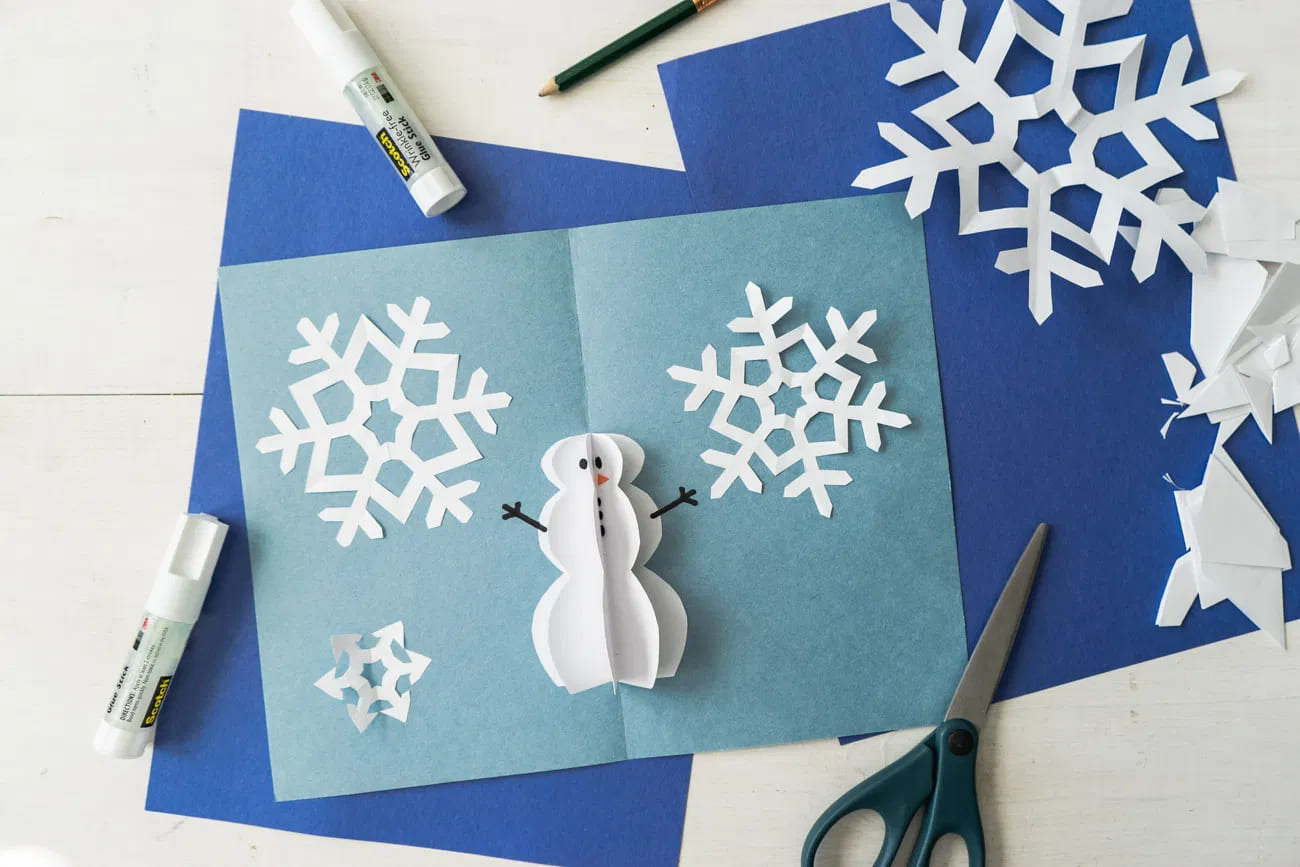
- Draw on the sheet a4 White, 9 large circles and 7 smaller ones. To make them you can help yourself with a large plastic cup and a smaller one for coffee. Now cut all the circles and then fold them in half.
- With glue, match one half of the circle great with another half moon great and keep it up until the sheets run out available. Do the same with the smaller circles.
- Take the colored cardstock and fold it in half applying pressure. Now open and place in the center of the fold the smaller circles above and the larger ones below. Paste to get them to join to cardboard.
- Now draw to your puppet the eyes e gods small buttons with black, and a carrot-shaped nose with the orange marker. If you prefer to give your puppet arms too, draw stylized arms on the base card.
Your puppet is now ready e you can decide if leave the background as it is or give it other decorations like snowflakes made with the white card or draw by hand with a silver marker.

How to make a pop-up gift card for Christmas: images and photos
Have fun making these cute Christmas pop-up cards and experiment with new creations starting with our quick and easy tutorials.


Add comment