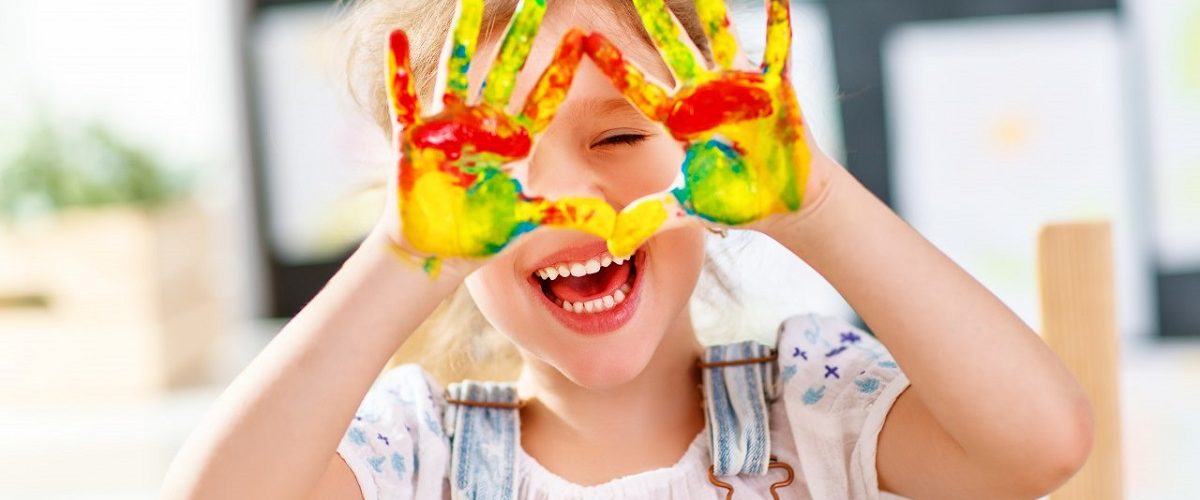
Crafts are one of the most fun resources to keep children entertained at home. It’s the perfect time to look for creative solutions so that your children don’t get bored and are entertained and happy.
What benefits do crafts offer children?
Crafts have great benefits for the little ones in the house. Develop their creativity and imaginationThe results of the study are that they improve concentration, self-esteem and self-confidence.
– sponsor –
Most importantly. children experience and learn to develop their creative capacity, I’m sure they’ll have a great time in the process. They just have to try not to get too dirty and frame the result.
You may be interested in: Original ideas for felt crafts.
Crafts with plastic bottles
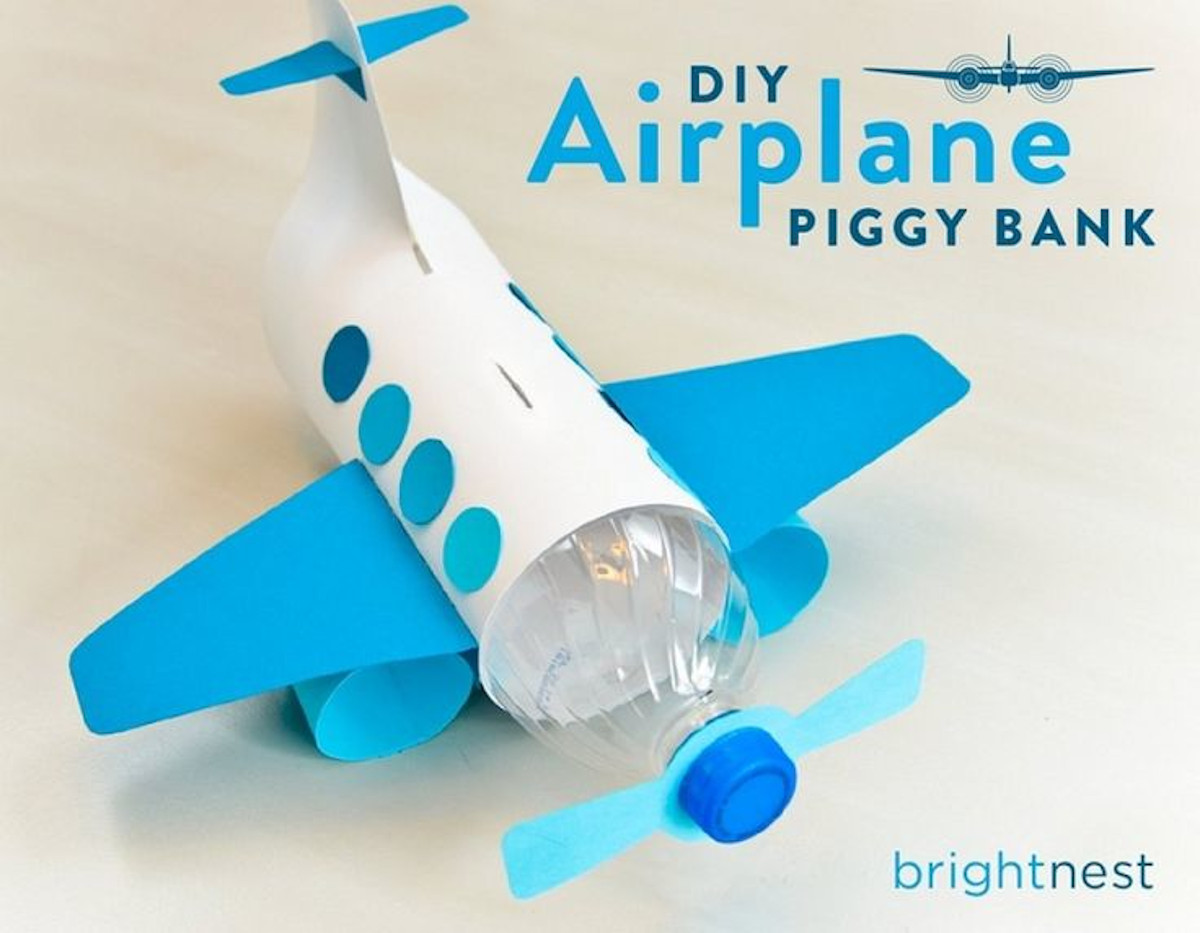
You have to bet on the creative recycling! Plastic bottles accumulate at home and a good way to give them a new use is to make fun crafts with them. Here we show you how to make a airplane piggy bank.
With some cards and a plastic bottle you can make this fun craft that will also teach children the importance of recycling and saving. You will need: blue and white cardboard, small plastic bottle, double-sided tape and scissors.
- To make the piggy bank slot. Cut a rectangular slot in the side of the bottle. That’s where you’ll put the coins in the airplane’s piggy bank.
- Design the fuselage of the plane. Draw two equal inverted “L” shaped pieces for the rear of the aircraft (rear half of the fuselage and rudder).
- Set up the paper fuselage and the rudder. Once the pieces have been cut, stick them to the bottles with double-sided adhesive tape. Note the slot, you must cut the paper to match.
- Draw and cut 2 engines. On the blue cardboard, draw two identical rectangles. Roll them up into tubes. These will be the engines of the plane. Stick them on each side of the plane. They will also serve as feet.
- Design the wings. On the blue cardboard, draw two triangles with rounded points that will be the wings of the plane. Cut them out and place them on the engines. Leave a tab to join them more easily.
- Make the propeller flat. Use the bottle cap as a guide and secure the plane’s propeller.
- Decorate the plane. Draw and cut the windows and the back wings. Let your children express their creativity and draw faces on the windows.
Children’s crafts with toilet paper rolls
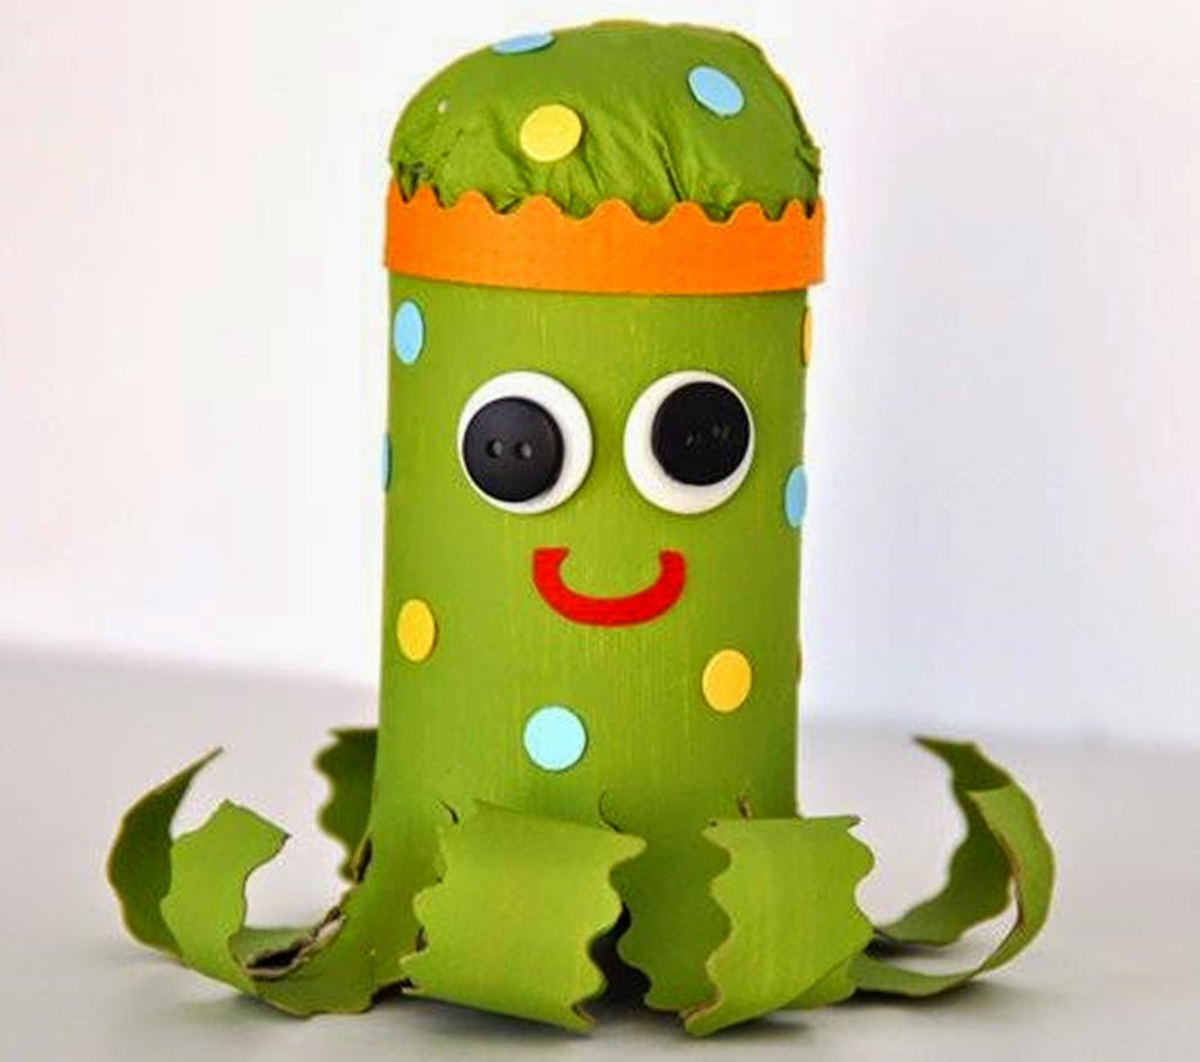
Toilet paper rolls offer many possibilities for creative crafts. We show you how to make a nice cardboard octopus. You will need: 1 roll of cardboard, green and white paints, coloured paper, brushes, wave shears, buttons, glue, a paper ball made of three tissues covered with another tissue.
- Start painting the cardboard roll white and let it dry.
- Prepare the paper ball with tissues so that it is the right size to fit on top of the cardboard tube. Stick it with glue.
- Paint the octopus green.
- Then cut 8 tentacles with the wave shears. Fold them up.
- Cut out small colored circles to decorate the Paul Octopus.
- For the eyes use some buttons and for the mouth stick a “u” on red cardboard.
- Create a crown with cardboard to conceal the union of the cardboard tube with the paper ball.
Creative Crafts: How to Make Stamps with Fruit
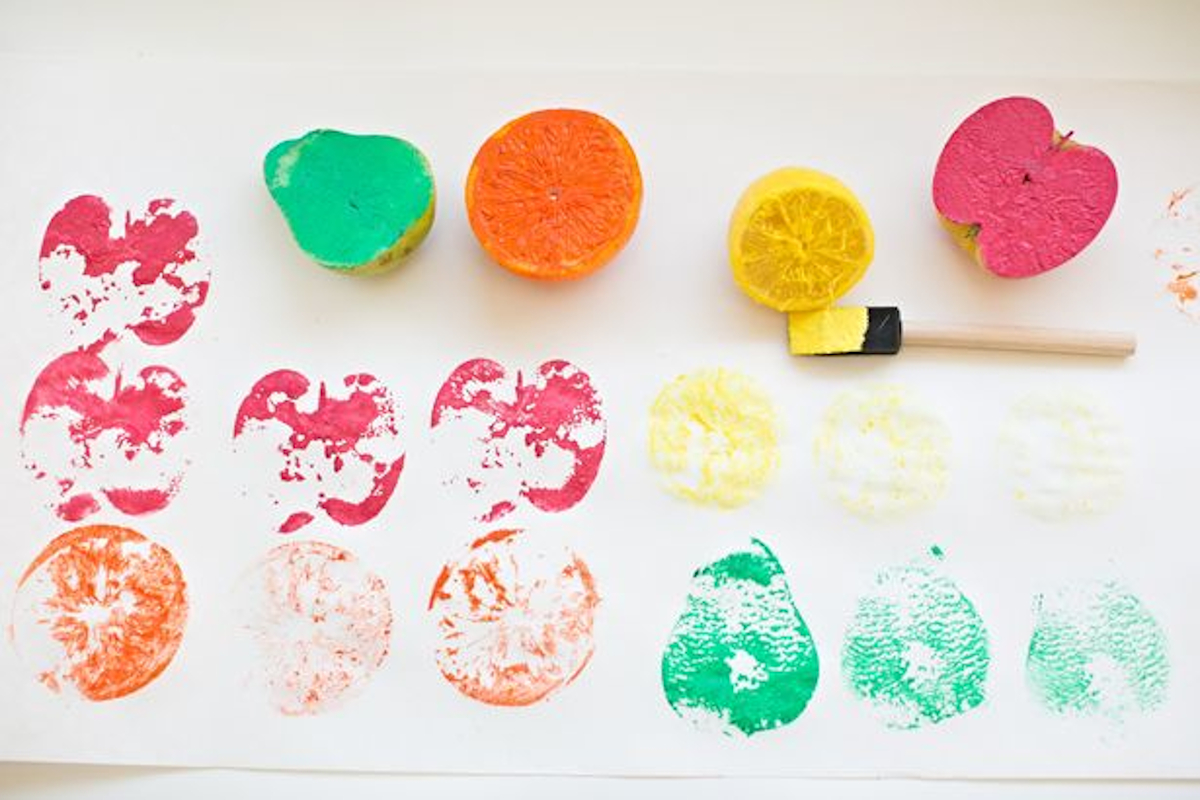
One of the easiest things to do is to create stamps with various fruits. With them you can create beautiful works of art. You will need fruits (oranges, apples, peaches…), paper to protect the table, sponge brushes, absorbent paper, washable paint, disposable plates.
- Start by cutting the fruits in half and drying them with absorbent paper to remove any excess moisture they may have.
- Place the paint you are going to use on a disposable plate.
- With the brush, you paint half of the fruit pieces and rest them on the paper. Press slightly but without moving the fruit and lift it.
- So on with all the fruits you want until you complete an original work of art.
Craft with tweezers: Indian elephant

To make this friendly Indian elephant you’ll need: cardboard, 5 tweezers, paint, plasticine and pipe cleaner.
- To make the body and ears of the elephant. Draw the body and ears independently on the cardboard. You can make some paper templates first.
- Cut out the cardboard figures and make slots to insert the ears.
- To make the legs, place the 4 clamps in pairs and stick them together.
- Paint the elephant and the legs in blue.
- The rider is made with the remaining clamp and surround it with pipe cleaner to make the arms.
- Use plasticine to make the turban and mustache.
How to make cardboard letters in 3D

Decorating with 3D letters is one of the upward trends in the world of crafts. They are simple to make and you can decorate them according to the tones or style of the room where you are going to place them. Here is a video of how to make them.
You may be interested in: Crafts: how to make embossed letters for decoration
What do you think of these crafts to keep your children entertained at home? It’s important that the little ones let their imagination run wild to boost their creativity.
– sponsor –

Add comment